16 Mar 2015

Google maps Ionic Framework [rough guide]

The Ionic Framework creates a rails like framework form cross platform mobile applications.

The full guide to setting it us is available here http://ionicframework.com/getting-started/

The basis application I used is created by this command 'ionic start [your app name] tabs'

To ensure you do not have premission problems when adding the google map plugin I then run 'sudo chmod -R 777 [your app folder]'

Open a developer google account and create a credential for an android application https://github.com/wf9a5m75/phonegap-googlemaps-plugin/wiki/Tutorial-for-Windows step 3 onwards.

The exact project id to identify your app for the google api is held in the root folder config.xml file.

 The base code for the tabs, controller and CSS is taken from here http://codepen.io/ionic/pen/uzngt

This

<script src="//maps.googleapis.com/maps/api/js?key=AIzaSyB16sGmIekuGIvYOfNoW9T44377IU2d2Es&sensor=true">
</script>

has to be in the index.html head because it will not load in time for the controller if its in the tab.

My tab is below;

<ion-view view-title="Maps">    <ion-content ng-controller="MapCtrl">        <ion-item>            <div id="map" data-tap-disabled="true"></div>            <a ng-click="centerOnMe()" class="button button-icon icon ion-navigate">Find Me</a>        </ion-item>    </ion-content></ion-view>


Generating the keyfile to sign the apk file


$ keytool -genkey -v -keystore key-name.keystore -alias alias-name -keyalg RSA -keysize 2048 -validity 10000

 Create an ant.properties file with the below;


key.store=D:\\path\\to\\the\\project\\keyname.keystore
key.alias=alias-name

This is a very important step

cordova plugin add plugin.google.maps --variable API_KEY_FOR_ANDROID="[your api key from developer.google.com]"

Build your finished apk file

cordova build android --release


22 Feb 2015

Simple CoffeeScript example wth Rails 4

I was searching around for a simple example to test how coffeescript is executed with Rails 4.

I found this example from Site point but it needs some updating to work with Rails 4;

The first part build the model.

http://www.sitepoint.com/building-your-first-rails-application-models/


The model has to be modified for Rails 4 and for url link to work.  I cannot take credit for the :before_save action it was answered here (stackoverflow)

1:  class Url < ActiveRecord::Base  
2:   validates :url, presence: true  
3:   before_save :ensure_protocol  
4:   private  
5:   def ensure_protocol  
6:    self.url = "http://#{url}" unless url_protocol_present?  
7:   end  
8:   def url_protocol_present?  
9:    u = URI.parse(url)  
10:    u.scheme  
11:   end  
12:  end  


The second part builds the views and controller.

www.sitepoint.com/building-your-first-rails-application-views-and-controllers/

The controller has to be modified because Rails 4 has secure params now, note the private method and its references replacing "params[:url]"

1:  class UrlsController < ApplicationController  
2:   def new  
3:    @shortened_url = Url.new  
4:   end  
5:   def create  
6:    @shortened_url = Url.new(url_params)  
7:    if @shortened_url.save  
8:     flash[:shortened_id] = @shortened_url.id  
9:     redirect_to new_url_url  
10:    else  
11:     render :action => "new"  
12:    end  
13:   end  
14:   def show  
15:    @shortened_url = Url.find(params[:id])  
16:    redirect_to @shortened_url.url  
17:   end  
18:   private  
19:   def url_params  
20:    params.require(:url).permit(:url)  
21:   end  
22:  end  


The last part creates the coffeescript.

http://www.sitepoint.com/using-coffeescript-in-rails/

 The coffeescript in Rails for reside here "~/shorty/app/assets/javascripts/shorty.coffee"

The coffeescript needs to be modified by prepending "http://" to the value which is assigned to the "current_value"
 
1:  $(document).ready ->  
2:   preview = $("#preview-url")  
3:   $('#url_url').keyup ->  
4:    current_value ='http://' + $.trim @value  
5:    if current_value is ''  
6:     preview.hide().attr 'src', ''  
7:    else  
8:     preview.show().attr 'src', current_value  


The application.rb file works with the original generated javascript markup tags.

1:  <!DOCTYPE html>  
2:  <html>  
3:  <head>  
4:   <title>Shorty</title>  
5:   <%= stylesheet_link_tag  'application', media: 'all', 'data-turbolinks-track' => true %>  
6:   <%= javascript_include_tag 'application', 'data-turbolinks-track' => true %>  
7:   <%= csrf_meta_tags %>  
8:  </head>  
9:  <body>  
10:  <% if flash[:shortened_id].present? %>  
11:   <p class='shortened-link'>  
12:    The shortened url is available <%= link_to 'here',  
13:  url_url(flash[:shortened_id]) %>.  
14:    (Right click and copy link to share it).  
15:   </p>  
16:  <% end %>  
17:  <%= yield %>  
18:  </body>  
19:  </html> 

Github repo: https://github.com/ramblingbarney/shorty

17 Feb 2015

MySQL Replication using Virtualbox VM's

Setup Virtualbox

Go to 'Virtualbox' -> 'Preferences'


Create a 'Host only Network', this name will be used for the 2nd adaptor for each of the VM's later


Create a VM using Ubuntu Server 14.04.1 and clone it twice


Each VM will have 2 Network Adaptors enabled


Create a port forwarding rule so you can access the VM from the host command line using ssh


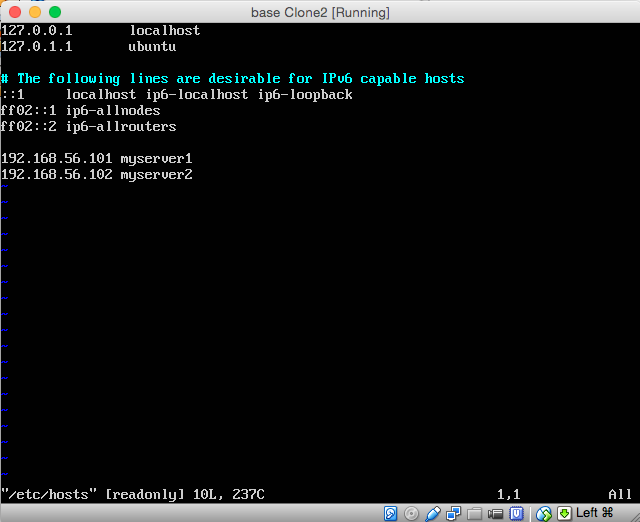
Notice how the ip address for the guest is set later in '/etc/network/interfaces' and '/etc/hosts'


If you use the '/etc/hosts' to assign a host name to the IP address be sure to use this when creating users in MySQL replication later because connection between the two VM's will translate the IP address to the host name so the users have to be set using the host names and not IP address to ensure MySQL will recognise that the permissions have been set.

For trouble shooting and routine tasks MySQLAccess and MySQL Utilities have been created.  To install the utilities use 'sudo aptitude install mysql-utilities' in the VM bash terminal.

To complete the replication process do the following;

Step One—Configure the Master Database

Open up the mysql configuration file on the master server.

sudo vim /etc/mysql/my.cnf

The first step is to find the section that looks like this, binding the server to the local host:

bind-address            = 127.0.0.1

Replace the standard IP address with the IP address of server.

bind-address            = 192.168.56.101

The next configuration change refers to the server-id, located in the [mysqld] section. You can choose any number for this spot (it may just be easier to start with 1), but the number must be unique and cannot match any other server-id in your replication group. I’m going to go ahead and call this one 1.

Make sure this line is uncommented.

server-id               = 1

Move on to the log_bin line. This is where the real details of the replication are kept. The slave is going to copy all of the changes that are registered in the log. For this step we simply need to uncomment the line that refers to log_bin:

log_bin                 = /var/log/mysql/mysql-bin.log

Finally, we need to designate the database that will be replicated on the slave server. You can include more than one database by repeating this line for all of the databases you will need.

binlog_do_db            = newdatabase

After you make all of the changes, go ahead and save and exit out of the configuration file.

We need to grant privileges to the slave. You can use this line to name your slave and set up their password. The command should be in this format:

GRANT REPLICATION SLAVE ON *.* TO 'slave_user'@'%' IDENTIFIED BY 'password';

Follow up with:

FLUSH PRIVILEGES;

If you encounter errors assigning privileges to user, the easiest way is to


DROP USER 'jeffrey';

FLUSH PRIVILEGES;

CREATE USER 'jeffrey'@'localhost' IDENTIFIED BY 'mypass';

FLUSH PRIVILEGES;


In your current tab switch to “newdatabase”.

USE newdatabase;

Following that, lock the database to prevent any new changes:

FLUSH TABLES WITH READ LOCK;

Then type in:

SHOW MASTER STATUS;

You will see a table that should look something like this:

mysql> SHOW MASTER STATUS;
+------------------+----------+--------------+------------------+
| File             | Position | Binlog_Do_DB | Binlog_Ignore_DB |
+------------------+----------+--------------+------------------+
| mysql-bin.000001 |      107 | newdatabase  |                  |
+------------------+----------+--------------+------------------+
1 row in set (0.00 sec)


This is the position from which the slave database will start replicating. Record these numbers, they will come in useful later.

If you make any new changes in the same window, the database will automatically unlock. For this reason, you should open the new tab or window and continue with the next steps there.

Proceeding the with the database still locked, export your database using mysqldump in the new window (make sure you are typing this command in the bash shell, not in MySQL).

mysqldump -u root -p --opt newdatabase > newdatabase.sql

Now, returning to your your original window, unlock the databases (making them writeable again). Finish up by exiting the shell.

UNLOCK TABLES;
QUIT;

Now you are all done with the configuration of the the master database.

Step Two—Configure the Slave Database
Once you have configured the master database. You can put it aside for a while, and we will now begin to configure the slave database.

Log into your slave server, open up the MySQL shell and create the new database that you will be replicating from the master (then exit):

CREATE DATABASE newdatabase;
EXIT;

Import the database that you previously exported from the master database.

mysql -u root -p newdatabase < /path/to/newdatabase.sql

Now we need to configure the slave configuration in the same way as we did the master:

sudo vim /etc/mysql/my.cnf

You have to make sure that you have a few things set up in this configuration. The first is the server-id. This number, as mentioned before needs to be unique. Since it is set on the default (still 1), be sure to change it’s something different.

server-id               = 2

Following that, make sure that your have the following three criteria appropriately filled out:

relay-log               = /var/log/mysql/mysql-relay-bin.log
log_bin                 = /var/log/mysql/mysql-bin.log
binlog_do_db            = newdatabase

You will need to add in the relay-log line: it is not there by default. Once you have made all of the necessary changes, save and exit out of the slave configuration file.

Restart MySQL once again:

sudo service mysql restart

The next step is to enable the replication from within the MySQL shell.

Open up the the MySQL shell once again and type in the following details, replacing the values to match your information:

CHANGE MASTER TO MASTER_HOST='12.34.56.789',MASTER_USER='slave_user', MASTER_PASSWORD='password', MASTER_LOG_FILE='mysql-bin.000001', MASTER_LOG_POS=  107;


If you have changed the default master log file name you may encounter errors as described here.

This command;

- It designates the current server as the slave of our master server.
- It provides the server the correct login credentials
- Last of all, it lets the slave server know where to start replicating from; the master log file and log position come from the numbers we wrote down previously.

Activate the slave server:

START SLAVE;

You be able to see the details of the slave replication by typing in this command. The \G rearranges the text to make it more readable.

SHOW SLAVE STATUS\G;

If there is an issue in connecting, you can try starting slave with a command to skip over it:


SET GLOBAL SQL_SLAVE_SKIP_COUNTER = 1; SLAVE START; 

18 Dec 2014

Survey Monkey API Ruby Part 1

I had an opportunity to access the Survey Monkey API and I found very few Ruby examples so I decided to post my own here, below is simple version without OAuth but it has page polling and optional field requests handled with splat variables.


1:  require 'httparty'  
2:  require 'certified'  
3:  require 'pp'  
4:  class SurveyMonkey  
5:   include HTTParty  
6:   attr_accessor :access_token, :base_uri, :api_key  
7:   attr_reader :result  
8:   def initialize(access_token, base_uri,api_key)  
9:    @access_token = access_token  
10:    @api_key = '?api_key=' + "#{api_key}"  
11:    @base_uri = base_uri  
12:    @result = {}  
13:   end  
14:   def get_survey_list(start_date, end_date, *fields)  
15:    current_page = 1  
16:    params_hash = {}  
17:    params_hash[:start_date] = "#{start_date}"  
18:    params_hash[:end_date] = "#{end_date}"  
19:    params_hash[:fields] = fields  
20:    params_hash[:page] = current_page  
21:    while true  
22:      @result = HTTParty.post("#{@base_uri}" + '/v2/surveys/get_survey_list' + "#{@api_key}",  
23:      #:debug_output => $stdout,  
24:      :headers => {'Authorization' => "bearer #{@access_token.to_s}", 'Content-type' => 'application/json'},  
25:      :body => params_hash.to_json  
26:     )  
27:     if @result["data"]["page"] == current_page  
28:      current_page += 1  
29:     else  
30:      break  
31:     end  
32:    end   
33:   end  
34:   def get_survey_details(survey_id)  
35:    @result = HTTParty.post("#{@base_uri}" + '/v2/surveys/get_survey_details' + "#{@api_key}",  
36:     #:debug_output => $stdout,  
37:     :headers => {'Authorization' => "bearer #{@access_token.to_s}", 'Content-type' => 'application/json'},  
38:     :body => {:survey_id => "#{survey_id}"  
39:     }.to_json  
40:    )  
41:   end  
42:   def get_respondent_list(survey_id, *fields)  
43:    params_hash = {}  
44:    params_hash[:survey_id] = "#{survey_id}"  
45:    params_hash[:fields] = fields  
46:    @result = HTTParty.post("#{@base_uri}" + '/v2/surveys/get_respondent_list' + "#{@api_key}",  
47:     #:debug_output => $stdout,  
48:     :headers => {'Authorization' => "bearer #{@access_token.to_s}", 'Content-type' => 'application/json'},  
49:     :body => params_hash.to_json  
50:    )  
51:   end  
52:   def get_responses(survey_id, respondent_ids, *fields)  
53:    params_hash = {}  
54:    params_hash[:survey_id] = "#{survey_id}"  
55:    params_hash[:respondent_ids] = respondent_ids  
56:    params_hash[:fields] = fields  
57:    @result = HTTParty.post("#{@base_uri}" + '/v2/surveys/get_responses' + "#{@api_key}",  
58:     #:debug_output => $stdout,  
59:     :headers => {'Authorization' => "bearer #{@access_token.to_s}", 'Content-type' => 'application/json'},  
60:     :body => params_hash.to_json  
61:    )  
62:   end  
63:   end  
64:  start_date = 'YYYY-MM-DD 00:00:00'  
65:  end_date = 'YYYY-MM-DD 00:00:00'  
66:  base_uri = 'https://api.surveymonkey.net'  
67:  access_token = 'XX register with developer API to obtain access token XX'   
68:  api_key = 'XX avaiable via Survey Monkey for your survey (not developer) account XX'  
69:  #create the object  
70:  xx = SurveyMonkey.new(access_token, base_uri, api_key)  
71:  #method call with parameters  
72:  xx.get_survey_list(start_date, end_date)  
73:  #print results to console  
74:  puts xx.result["data"]  

If a user can skip a question you cannot guarantee that the json tree will contain the data elements to traverse tree so you will have to retrieve each users complete data tree and then load them into normalised database tables.

An example of Oauth using the Google API is here.

To follow;
  • Error Handling

27 Nov 2014

debian 7 encrypted partitions setup and keyfile

How to setup Luks on Debian 7 here

 https://dl.dropboxusercontent.com/u/40638984/how_to_lvm_debian_wheezy.pdf

 Make sure to allow  a root partition of 300mb, see note.


Debian w/LUKS root+key file on USB
There are a few advantages to booting a system onto an encrypted root volume using LUKS keyfiles instead of passphrases. Using keyfiles, booting to an encrypted root volume can once again be automatic - no more entering a passphrase at the console during each boot cycle. Alternatively, the key-containing volume can be removed after boot and kept secure, so that the system can only be rebooted by the owner.

Following this guide should be quite safe. It's possible to maintain secondary access via the original passphrase still in LUKS's keystore, and relatively trivial to restore the original crypttab configuration. Still, it's best to have complete backups before you begin! I'll give some troubleshooting tips following the setup instructions.

NOTE: All bets are off unless you're running Debian GNU/Linux version 7.4 ("Wheezy") with a LUKS-encrypted root partition for which you possess the passphrase. You'll also need a spare USB thumb drive formatted as FAT32.

Setup
First, plug in your FAT32 or ext2 formatted USB drive and create within it a file of random content, about four kilobytes should do nicely:

dd if=/dev/urandom of=/media/THUMBDRIVE/keyfile bs=1024 count=4

Next, add this key to the LUKS keystore:

sudo cryptsetup luksAddKey /dev/sda1 /media/THUMBDRIVE/keyfile

Now the container can be decrypted using the key file. Next we'll need to set up crypttab to inform LUKS about where this key can be found. To do that, first lets get the USB drive's UUID, so we can reliably refer to it in our configuration:

ls /dev/disk/by-uuid/ | grep sda

Next, we'll need to direct LUKS to use this keyfile upon booting. Edit /etc/crypttab and make the root partition's line look like this:

sda5_crypt UUID=<LUKS Container UUID> /dev/disk/by-uuid/<USB drive UUID>:<USB key file name> luks,keyscript=/lib/cryptsetup/scripts/passdev

The real magic is in that last bit about the passdev keyscript. Because the decryption must take place so early in the boot process, USB disks are not normally mounted. In the past, we'd had to carefully write our own scripts that would find and mount the USB volume, then include that script in the initramfs. The developers of cryptsetup have included a solution, these days: passdev. Supplied a block device path (we use by-uuid because it will remain consistent across hardware changes) and a file path, passdev will temporarily mount the device and stream the file to STDOUT.

Finally, lets prepare the new, USB keyfile-aware initramfs. We'll have to direct initramfs to load some new modules into future builds. We'll need these in order for the kernel to access USB devices so early in the boot process. Edit /etc/initramfs-tools/modules and add the following lines:

vfat
fat
nls_cp437
nls_iso8859_1
nls_utf8
sd_mod
scsi_mod
usb-storage
usb-hid
uhci-hcd
ohci-hcd
ehci-hcd
usbcore


If you want, you can trim this down a bit if you know what encoding is in use by your filesystem, and choosing ext2 over FAT32. Personally, I prefer to use the FAT32 format because it is the standard default of most thumb drives, allowing me to buy an off-the-shelf disk and copy the key onto it in an emergency. The downside to this is that we need to support the several encoding flavors that geographically local FAT32 typically comes in: UTF-8, iso8859_1, and codepage 437.

Now, lets rebuild our initramfs using these modules and our modified /etc/crypttab. Type this command at a shell:

update-initramfs -u

...that's it, we're done! During the next reboot, grub (or whatever bootloader you're using) will load the initramfs and stub kernel, which will source the initramfs version of /etc/crypttab, causing the initramfs version of /lib/cryptsetup/scripts/passdev to be run with correct arguments, temporarily mounting the USB disk and piping the keyfile into cryptsetup, mounting the encrypted root container, allowing the boot process to pivot away from initramfs and into your real file system.

Using the alternate passphrase
If the system can't find the keyfile at boot time, you'll find yourself at a BusyBox prompt running from within the system's initramfs. As long as your original passphrase is still loaded into a LUKS key slot (i.e. you haven't intentionally removed it), simply issue these commands at the BusyBox shell, replacing /dev/sda1 with your LUKS container's partition, sda1_crypt with your encrypted root volume's name within /dev/mapper, and entering the passphrase when prompted after issuing the first command:

cryptsetup luksOpen /dev/sda1 sda1_crypt
vgchange -ay

Restore /etc/crypttab to its working state, regenerate your initramfs, and then reboot. You should see the familiar LUKS passphrase prompt, as before we started.

Removing the alternate passphrase
It is also possible to remove the original passphrase from the LUKS keystore, leaving the keyfile as the only way of booting the system. Issue the following command and, when prompted, enter the passphrase to be removed:

cryptsetup luksRemoveKey /dev/sda1
I have posted this here because the original page is nolonger available and it should be kept because it works..

7 Jan 2013

Debian Powerpc G4 wake on lan alternative

I had been searching for hours on alternatives to wake on lan for a G4 Mac Mini I bought for a home server project, these posts
http://ubuntuforums.org/archive/index.php/t-1701534.html
http://ubuntuforums.org/archive/index.php/t-1889083.html

to a very useful linux package powerpc-utils for controlling the open firmware which can schedule the mac to boot up on week days and weekends and also turn off the very annoying and loud chime on startup.

30 Sept 2012

Class Library Templates Visual Studio 2008 Where are you

Having spent far too long in hindsight trying to find these templates for some work on functions and regular expressions I gave up and installed the express version of Visual Studio 2010.

FYI, using the command line to populate the default templates doesn't work as described here.

So why am I doing this, a new role where SQL and .net are the sole available languages got me thinking of how to implement data cleansing routines from perl in SQL.

The appendix in this book Inside Microsoft SQL Server 2008: T-SQL Programming gives you the VB code you need which is a great place to start to learn intermediate techniques such as user defined functions and CLR assemblies.

CLR Assemblies allow you to incorporate Regular Expressions into SQL which can be used to verify email address structures and are the basis of data cleaning.